
PRISM
¶ Welcome to PRISM by Launtel
Please note that PRISM is in a state of development and certain features may be unavailable at this time.
PRISM is a next-generation services and ordering portal for business clients of Launtel. It represents Launtel's next stage in customer interaction and automation, making changes and turn-around time for services quicker and easier. This includes Internet, Voice, and Billing.
¶ Why do we need PRISM?
Currently, Launtel provides very little public-facing visibility into business services or systems. With the advent of the residential portal and its subsequent success, a need for a business equivalent became apparent.
The goal with PRISM is to unify internet, voice, and billing systems into an easy to use, public facing entity that will streamline business interactions.
There is a further long term goal to additionally unify the various disparate web applications that Launtel provides to business customers into PRISM at some stage. This will make PRISM the single portal for all of Launtel business customers.
¶ Functions of PRISM
Use the links here to navigate to the various sections of the PRISM user guide.
Voice A guide to using the voice functions of PRISM
Internet A guide to using the internet functions of PRISM
Billing A guide to billing functions of PRISM
User & Role Management A guide on how the PRISM user model and permissions are handled
¶ Voice
A future version of PRISM will allow for simple voice platform changes and provisioning.
If you cannot see the voice summary option, you may need to request additional permissions from your company admin.
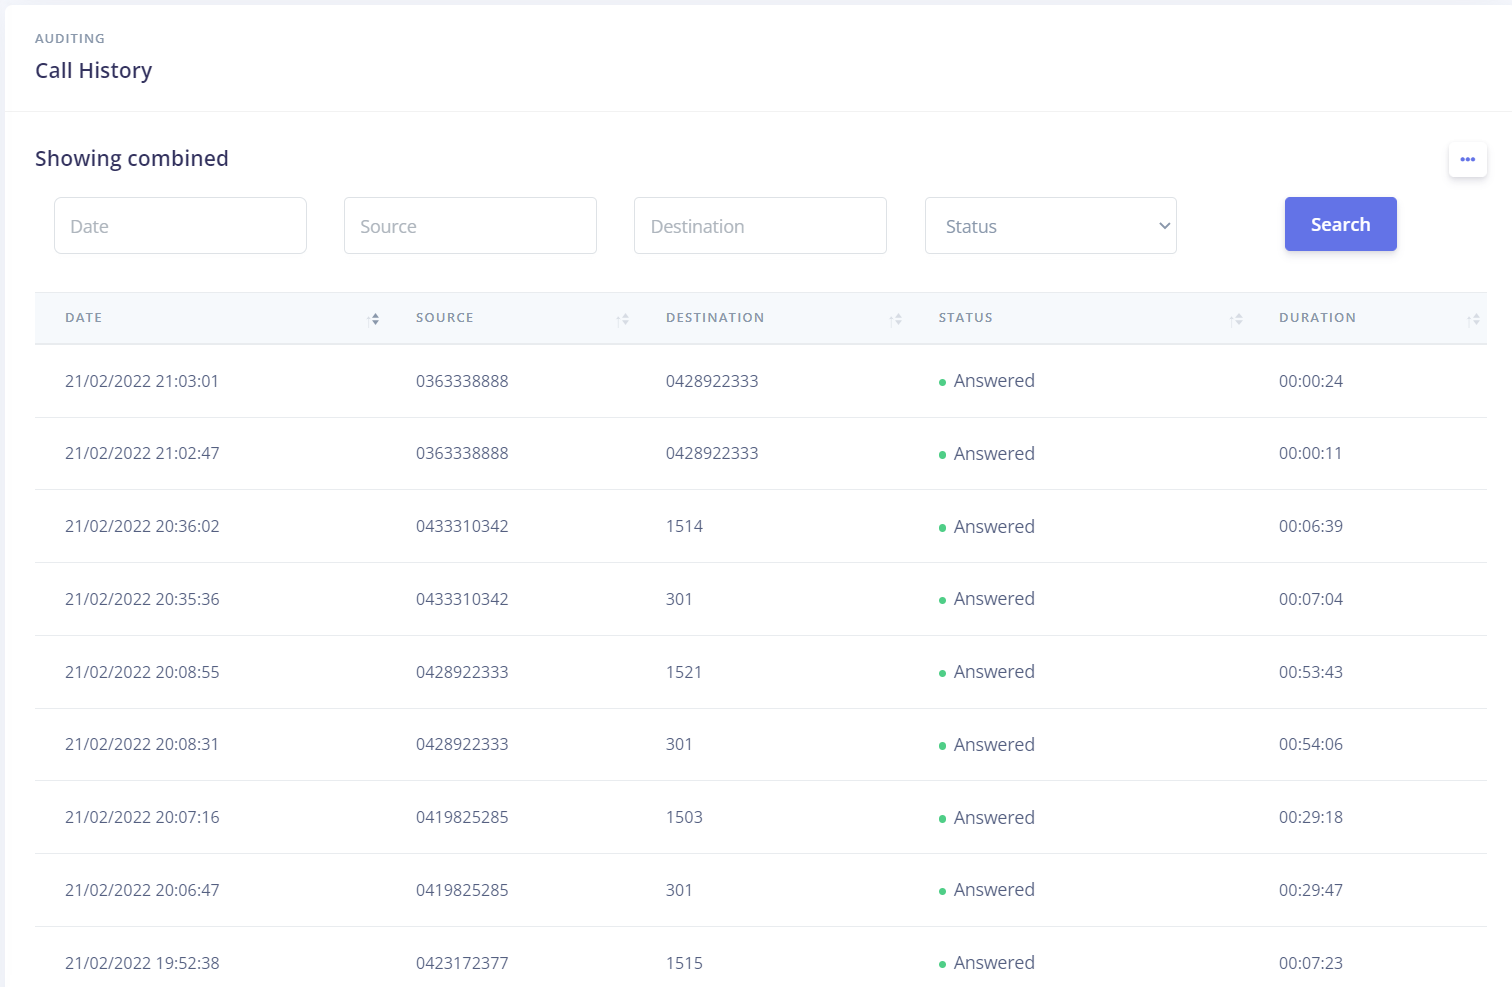
The voice functions of PRISM allow for call metric analysis and voice traffic details.
¶ Summary
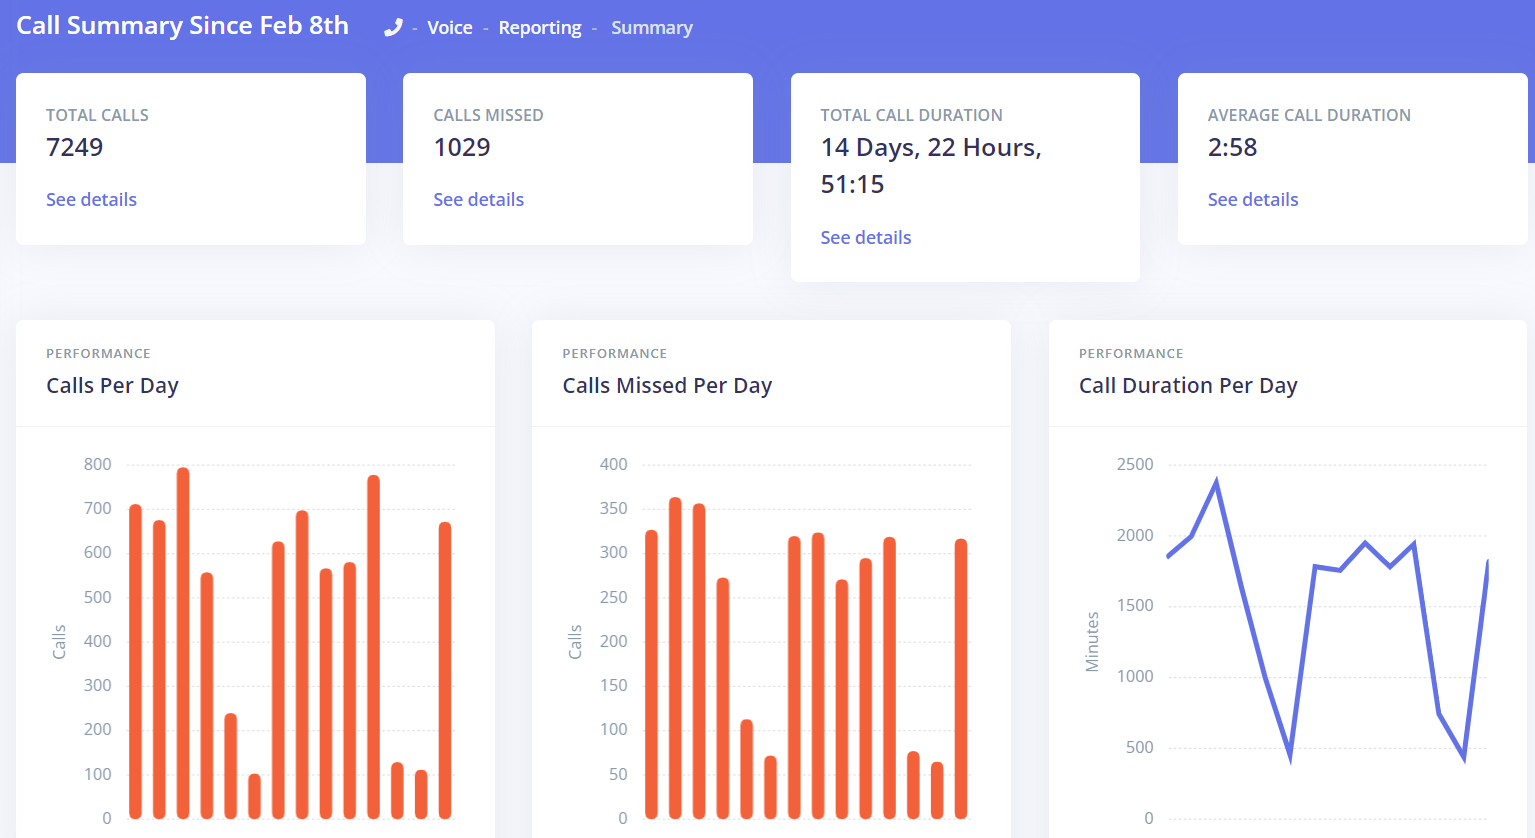
The metrics consist of a summary dashboard with some at-a-glance metrics.
The summary is based on the previous 7 days of voice traffic and allows for a quick overview of voice data.;
The "See details" links load the details voice metrics page at the appropriate panel anchor.
¶ Detailed
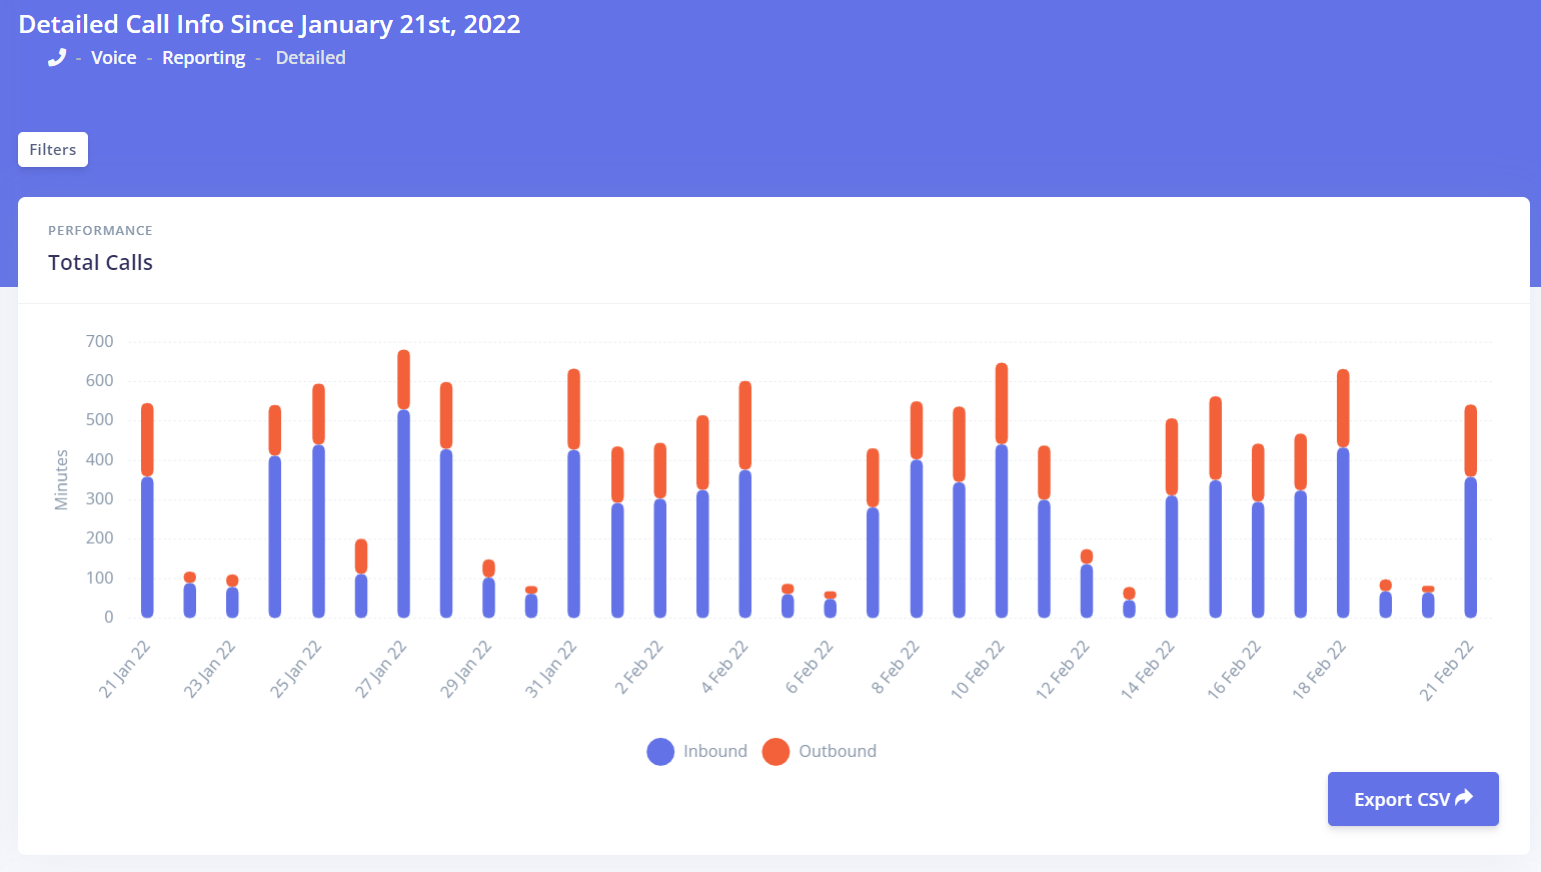
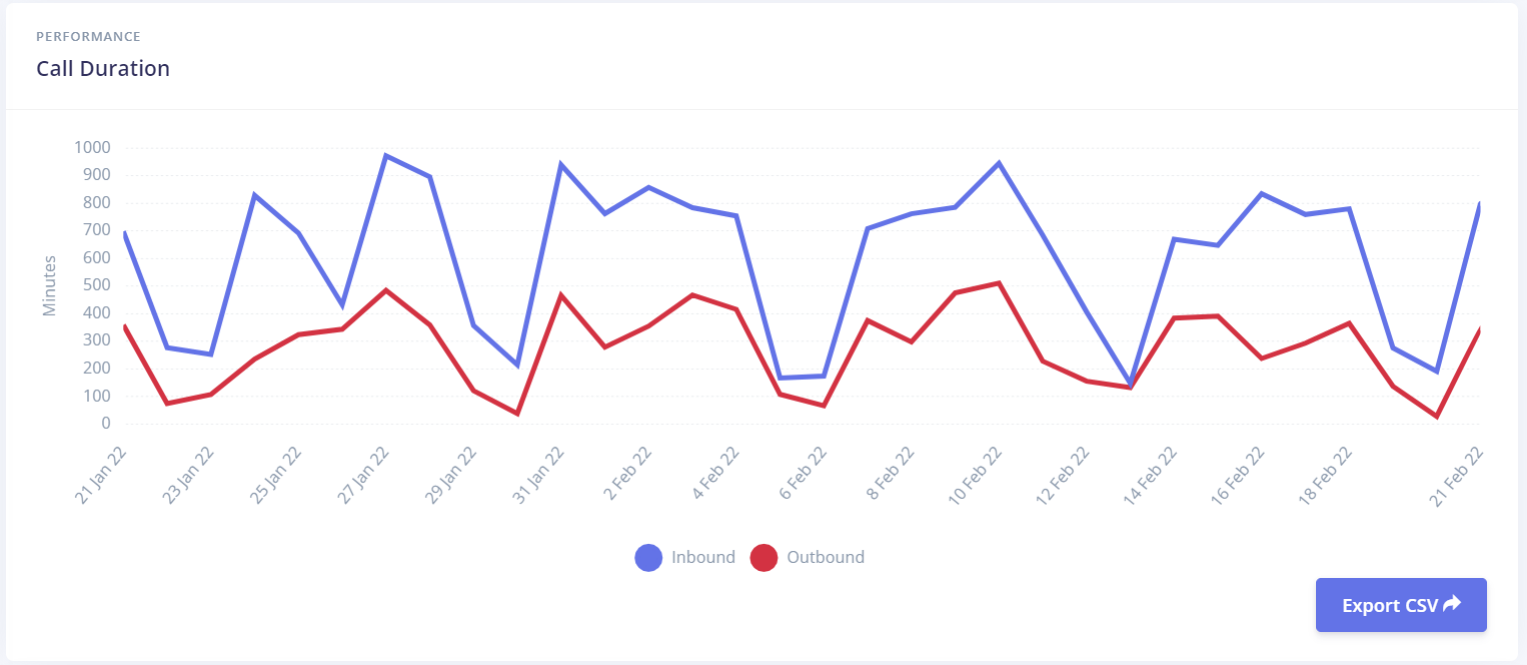
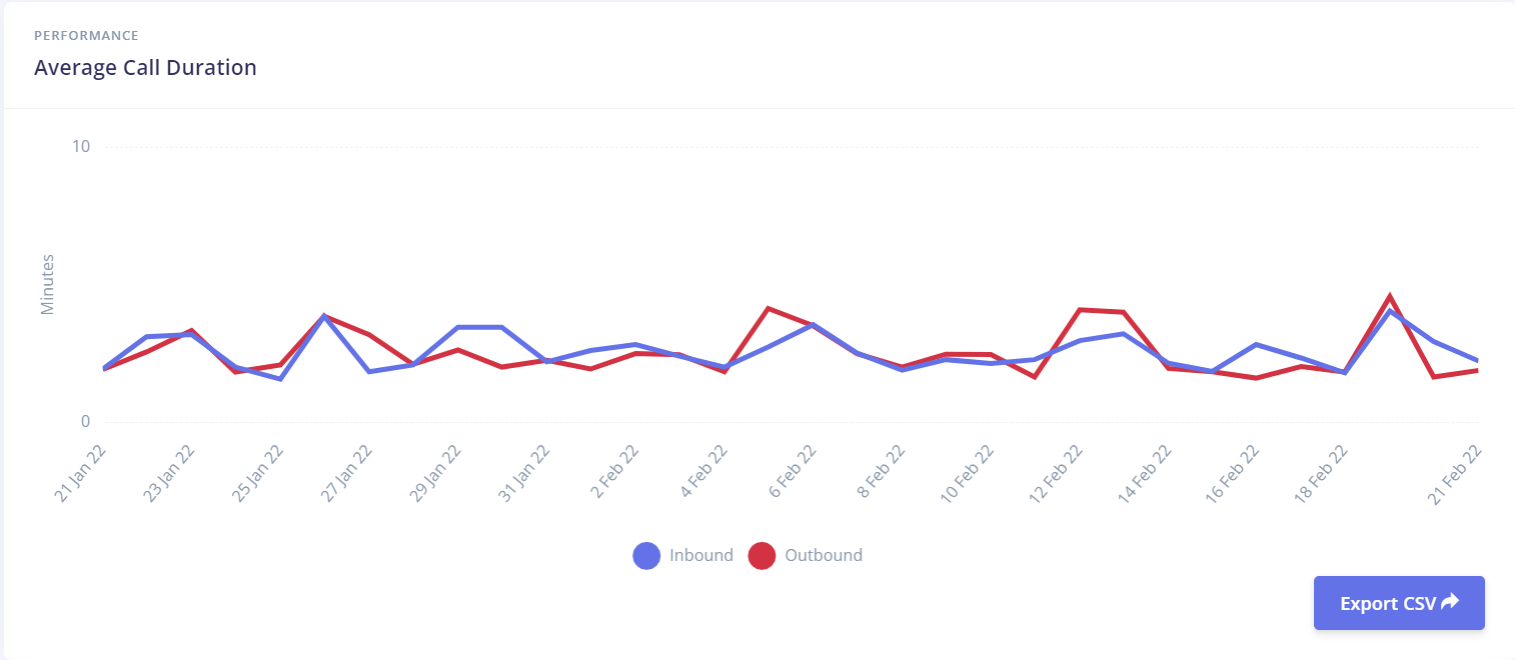
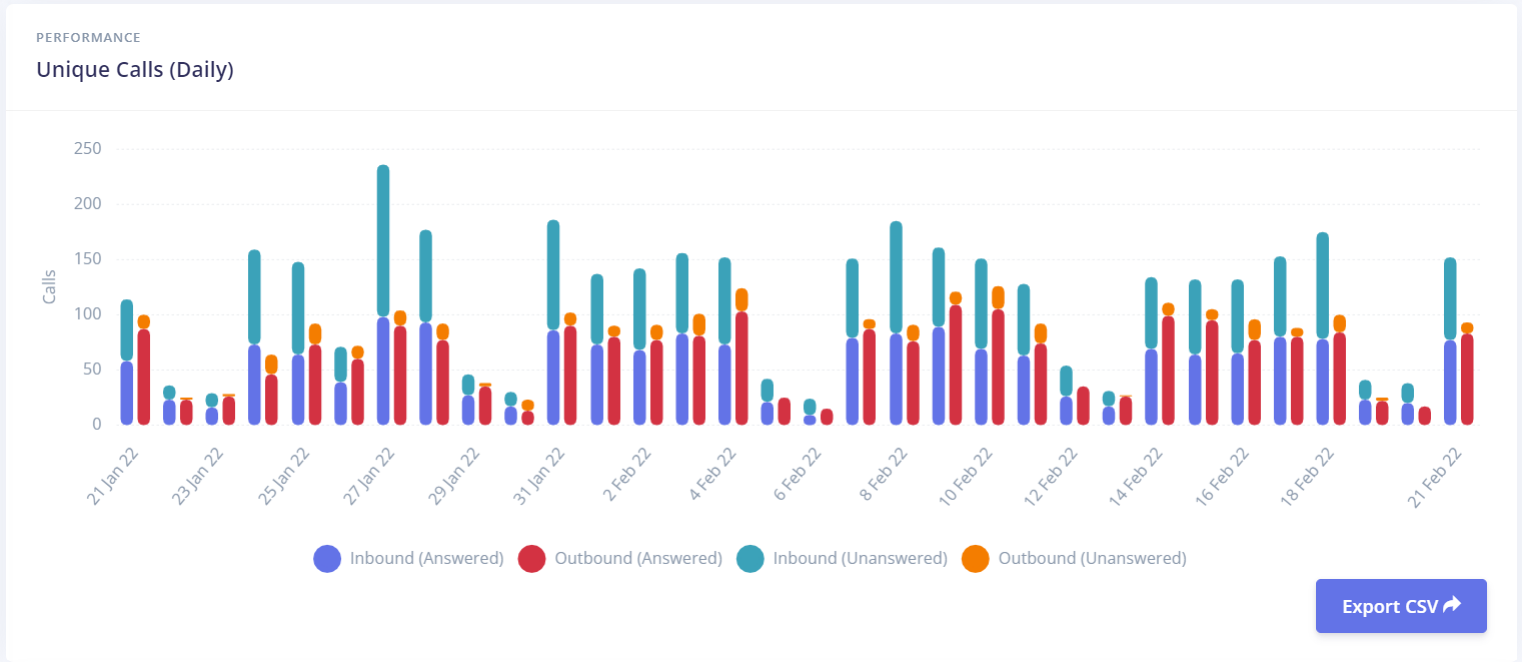
The detailed voice metrics may take a moment to load if your company processes a lot of calls.
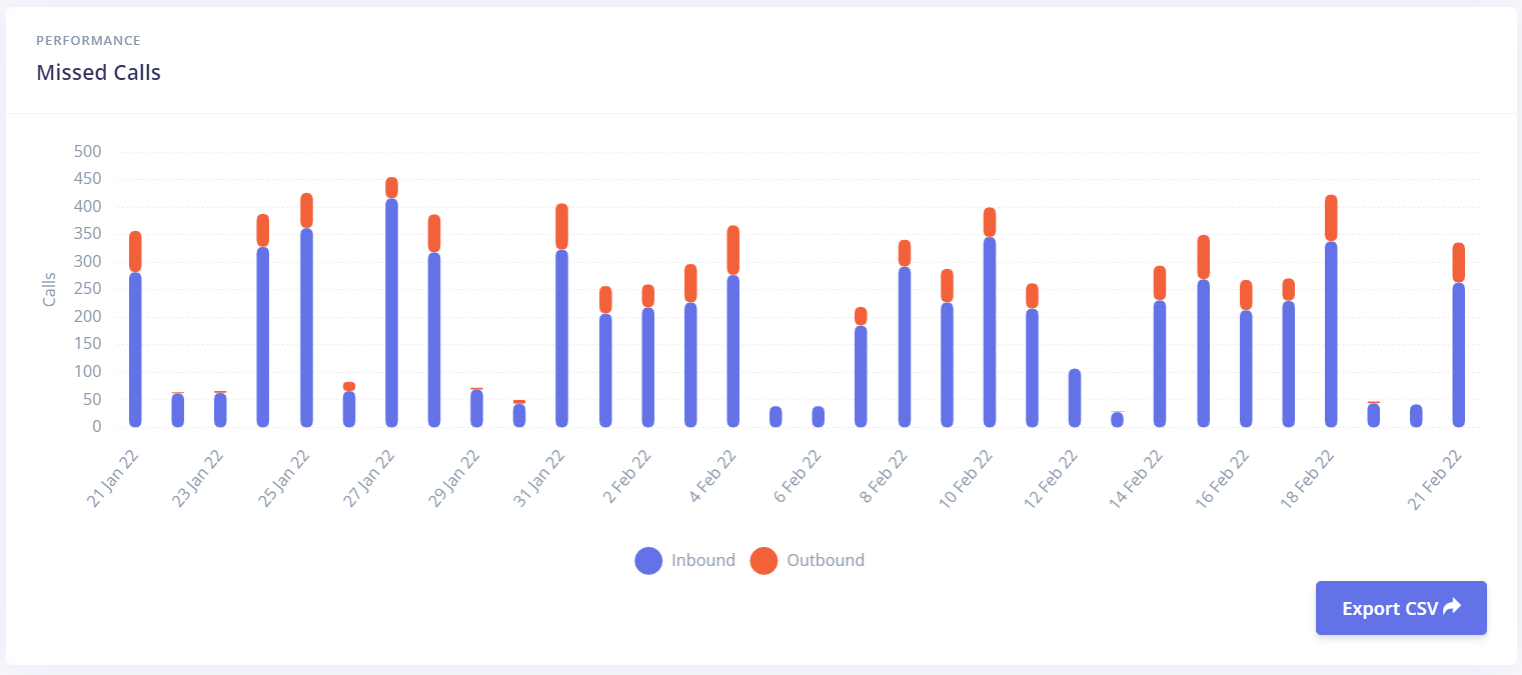
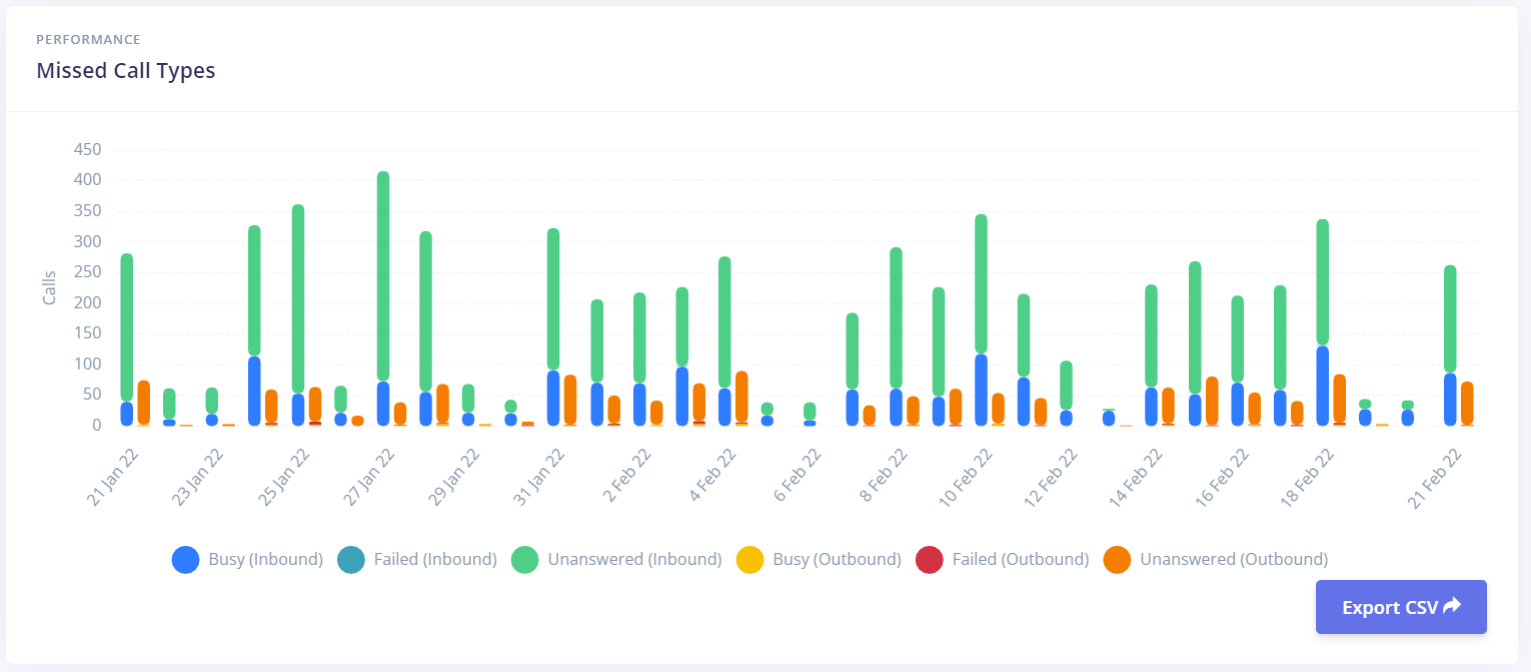
A detailed dashboard with various in depth and filterable metrics as well as export to CSV capabilities. The dashboard allows for enabling or disabling any metric on the various charts and setting a time range for all charts at once.
¶ Navigating the Voice Dashboards
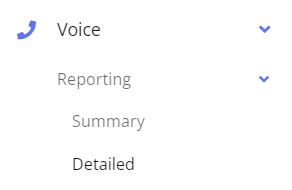
Navigating to the various voice dashboards can be accomplished via the main dashboard "Voice" icon which will take you to the voice summary dashboard.
Another option is to navigate directly to the summary or detailed dashboard via the navigation menu in the left sidebar.
-
Click the Detailed menu option to load the detailed voice dashboard.
-
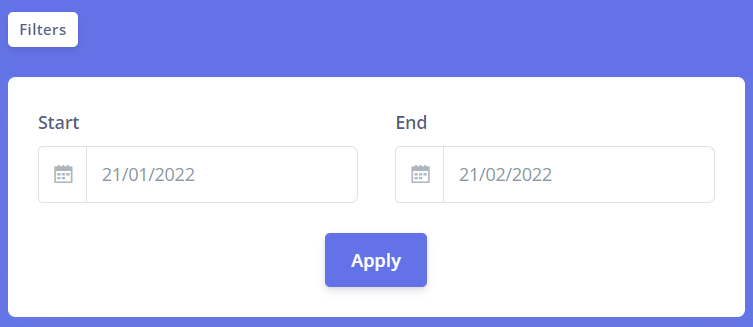
Set the date range filter in the filter drop down at the top of the page and press Apply.
-
Once the page has loaded and the new filtered metrics are visible you can furthur filter any of the graphs by clicking on the legends as follows:
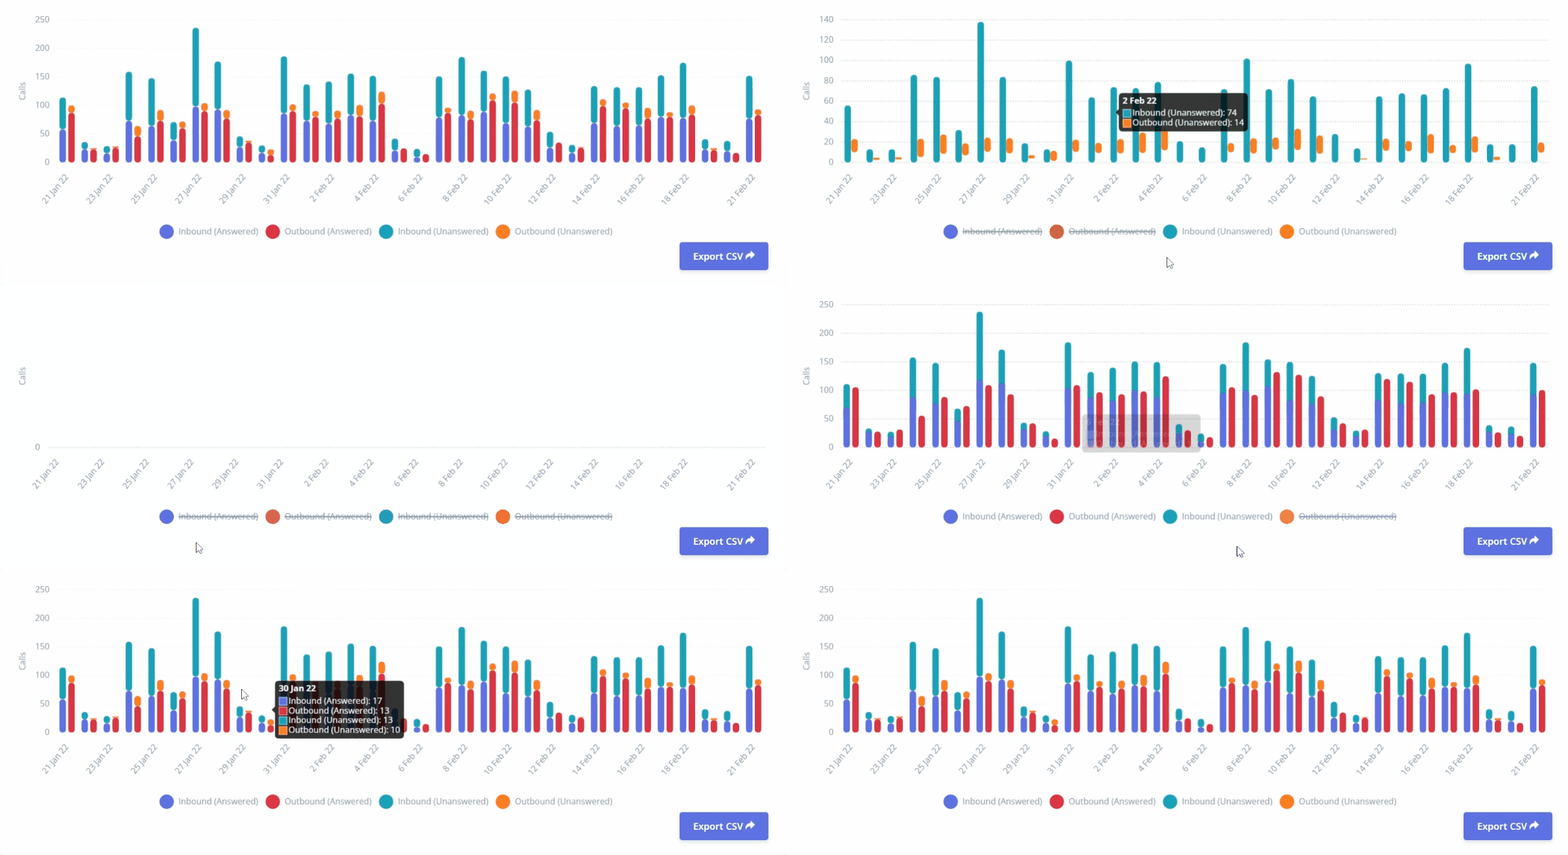
Each panel is also exportable to CSV, simply click on the Export CSV button on the bottom right of each panel.
¶ User and Role Management
Permission and Role management is designed to be flexible and granular in PRISM. To this end a definition of the terminology and a break down of the structure is required.
¶ Definition of Terms
Role: A role is a collection of permissions that can be configured by a sufficiently privileged user within an organisation or by a System Admin.
Permission: A permission is a granular object that allows access to a specific part of PRISM. One or more permissions contribute to a role.
This model allows for the definition of a role with a set of permissions that can be applied to multiple users within an organisation without needing to set every permission required on every user.
¶ Creating Users and Roles
To begin you will need to ensure you have a user in the PRISM that has been granted the "Organisation Admin" role. If you are unsure if you have this then contact a member of the technical team to have this setup and organised for you.
Once you have the required details and permissions, login to PRISM.
¶ Adding New Roles
-
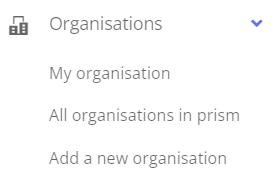
Click the Organisations drop down.
-
Choose the My Roles option.
-
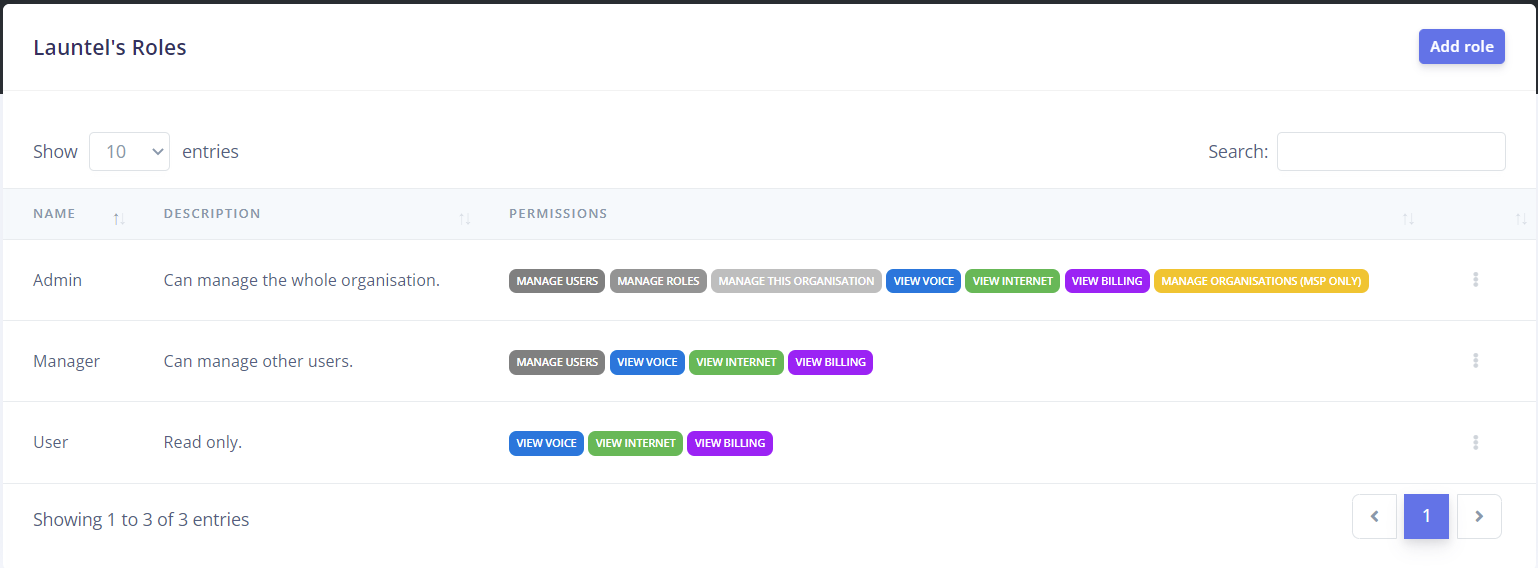
The roles list appears.
-
You can either add a new role with the Add role button in the top right or edit an existing role with the three dot menu on the right of each role.
-
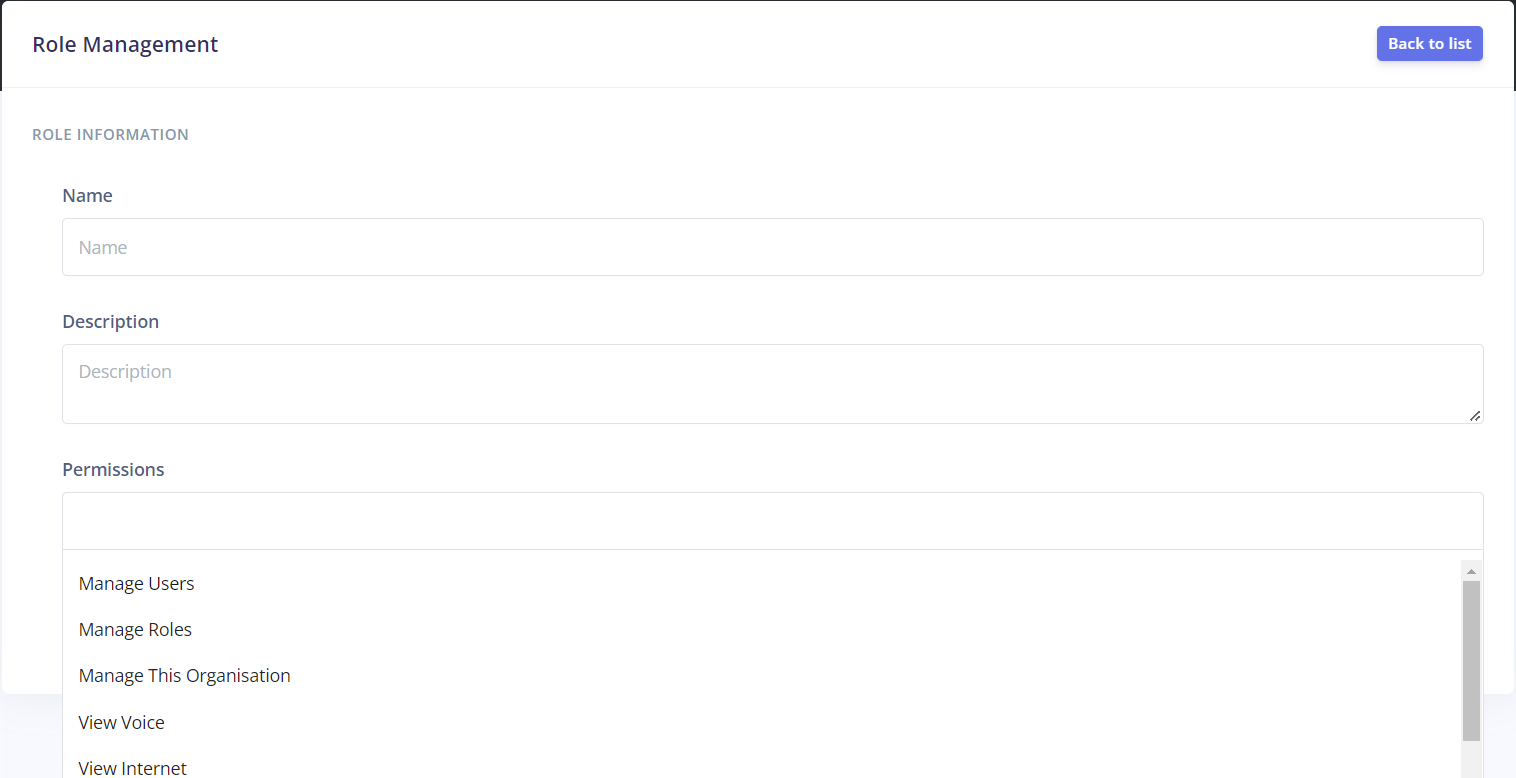
The role edit screen allows for name, description, and permissions management. Adding a permission to a role grants any user with that role assigned the permissions of the role. In this way you can limit access to many users at once by assigning a created role.
-
Once you have the roles configured as needed it is time to create users and assign the roles to them.
¶ Adding Users
-
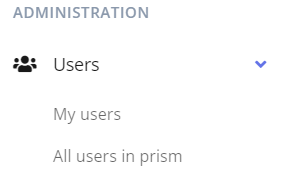
Click on the Users drop down on the left sidebar.
-
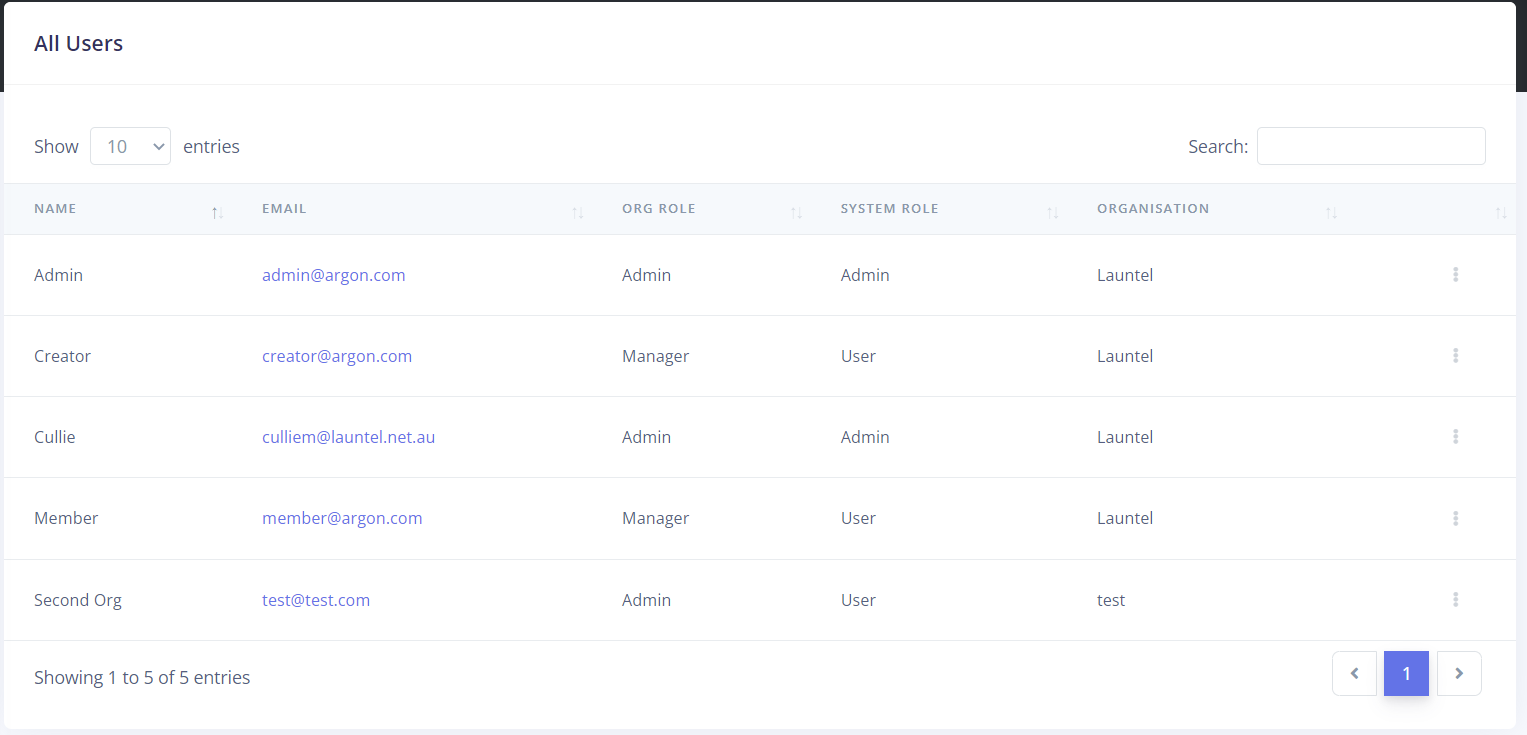
Click My users, you will be taken to the user list.
-
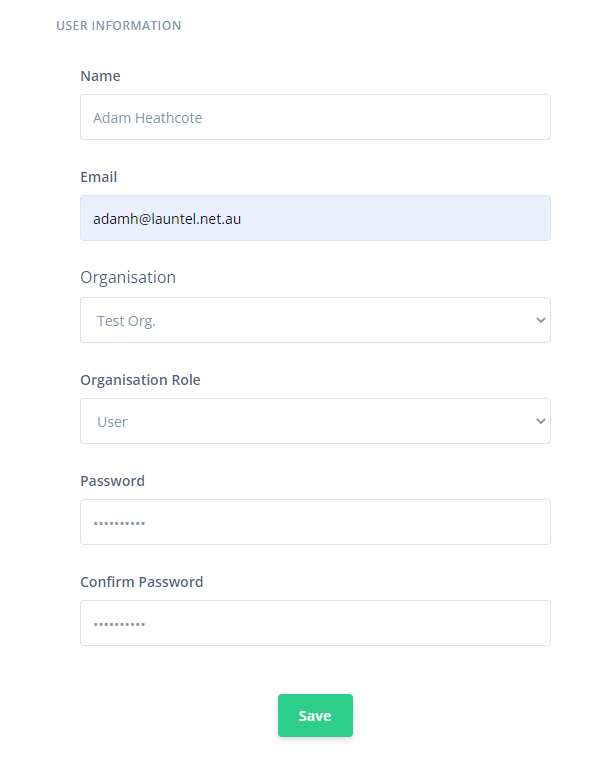
Use the search to find an existing user or add a new one with the Add user button in the top right.
-
Assign the role to the user based on what permissions you would like that user to have.
-
Click Save.