¶ Getting Started
- To begin, open your preferred web browser such as Internet Explorer/Edge, Mozilla Firefox, Google Chrome, Safari or Opera.

- In the address bar type or copy and paste the follow web site address. Replace companyname with your business name.
http://companyname.hv.launtel.net.au/phonebook/
Note: If you get a "not found" error or a "site can't be reached" error please contact Launtel on 1800 528 683 as we may have you listed under a different business name.
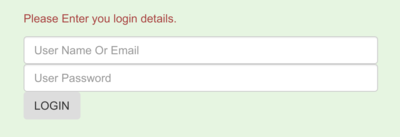
You will now be presented with the remote phonebook login screen. The username is usually your extension number and the password can be acquired from Launtel.
¶ Toggle between Read only and Edit mode
- By default the phone book is in read only mode, this will allow you to search existing records and export the phonebook to a CSV (Comma Separated Values) or PDF document.
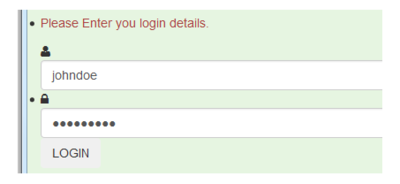
- Edit mode is enabled by Clicking the Edit Mode button on the top left, this will prompt you for user name and password.

- Step 3: Enter the assigned user details and click the Login button.
After toggling edit mode you will be able to create new contacts and edit existing contacts.
¶ Create a Contact
- To add a new contact click the New button on the top left.
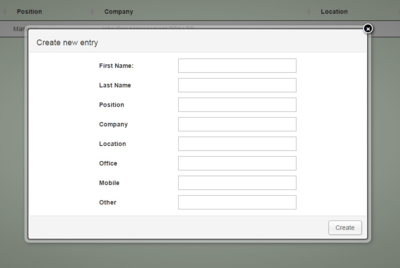
First Name: Enter the contact's preferred first name.
Last Name: Enter the contact's last name.
Position: Enter position or title.
Company: Enter the company name.
Location: This can be an address or office name.
Office, Mobile and Other phone number: Enter the number to be dialled. This should entered as if dialling a number from the phone i.e. 1300046464
Note: Phones will struggle to dial a number from the phonebook if it contains spaces.
Phone Book: There is a limit of 5 different phone books the numbers can be assigned to. If you choose to use more than one phone book you will need to contact Launtel to reconfigure the phones to make use of the extra phone books and to let them know the labels for each phone book. Email support(at)launtel.net.au with the following template:
 Subject: multiple phone book <company name>
 Please configure the phones with the following phone books
 Phonebook  Label

 Example:
 Please configure the phones with the following phone books
 1: Staff
 2: Suppliers
 3: Customers
- Click the Create button.
¶ Edit a Contact
- Tick the Checkbox on the left hand side of the contact.

Note: You can select multiple contacts by holding down the CTRL key.
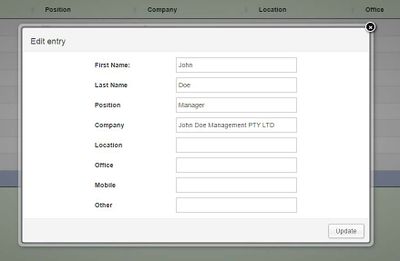
- Click the Edit button on the top of the page.

- Update the required details then click the Update button.
- To delete a contact tick the checkbox on the left hand side of the contact and then click the delete button on top of the page.
¶ Quick Edits
- Quick edits can be performed by clicking on the relevant field when in edit mode, this is referred to as inline editing.

To commit the update, simple click on an area outside the field.
¶ Toggle Dial Mode
The Launtel hosted voice phonebook features a "click to dial mode" for quick and easy calling of phonebook contacts.
- Click the Dial Mode button. You will notice the phone numbers become hyperlinks.

- Click the desired phone number to call.

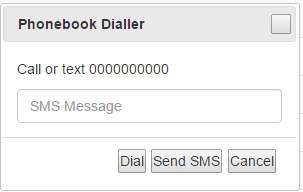
- The Phonebook dialer will appear, allowing you click the dial button to place a call from your phone.
¶ Exporting and Importing Contacts
¶ Exporting
The Launtel phonebook can produce a nicely formatted CSV (Comma Separated Values) file or a PDF (Portable Document Format) file.
- Simply select the CSV or PDF buttons from the top panel.
The relevant file will be generated and downloaded to your computer.
¶ Importing
It is possible to upload a properly formatted CSV file to the Launtel phonebook to prevent having to manually create each entry.
- Ensure the phonebook is in edit mode by clicking the Edit Mode button on the top panel.
- Scroll to the bottom of the page and click the Sample CSV File link to download the sample CSV.

- Edit the sample CSV file as required or alternatively, export an Excel spreadsheet to CSV making sure to follow the sample layout.
- Click the Choose File button and pick your new CSV.
- Click the Upload CSV button.
¶ Handling User Permissions
The phonebook allows a designated admin or admins to control the permissions assigned to the various users of the phonebook.
- Ensure the phonebook is in edit mode by clicking the Edit Mode button on the top panel.
- Select the User Privileges option next to the logout link.

- Once at the user privilege admin screen. Choose the New button.
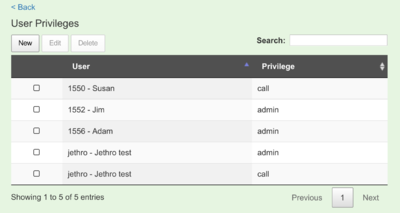
- Select the user/extension you wish to grant privileges to and choose the desired permissions level. Then choose Create.

- Editing user permissions is much the same process, however the user must be selected first and the Edit button must be chosen.
Note: If a user is not added to the privilege screen, their permissions will default to read only.